

This is the bathroom vent I inherited on my trailer:

Couple of things to note on the previous installation of this vent.
- Look at all the silicone sealer they put all over it. Even after putting all this silicone the vent still leaked. If you decide you need to add a sealant the best thing to use on fiberglass is 3M Marine Sealant. Silicone sealer will usually leak very soon after application on fiberglass and it makes a horrific mess for someone to have to clean up when the vent is replaced.
- The vent is riveted, which can be ok, but they pulled the rivets too tight on some of these and cracked the flange. Probably the reason they thought they needed all the silicone sealant.
This is what I was left with and had to clean up before installing the new vent. It took close to two hours to remove the silicone residue. ![]()

After cleaning, put down 2 strips of Colormetrics Gray Putty Tape / Butyl Tape 1/8" x 1" x 30' (Single Roll) around the opening, set the new vent and pulled the rivets snug then broke off the stems with pliers instead of snapping them off with the snap rivet tool. Put excess butyl plugs over rivets.
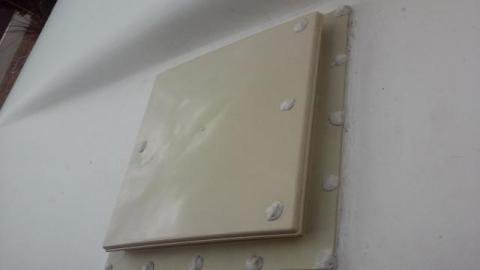
Just butyl tape, no sealant needed! About two weeks from now I'll take off the excess butyl that has oozed out with a putty knife and done for years to come. Next time the vent needs to be replaced it will be able to be removed and prepped for the new vent in about 20 minutes. Old buytl comes right off with a putty knife and I use Goof Off and a rag which cleans any butyl residue off the glass very quickly.

New Comments