Here are some photos of recent mods to our 2011 13' Scamp.

Our bathroom sink / cabinet and raised shower floor.
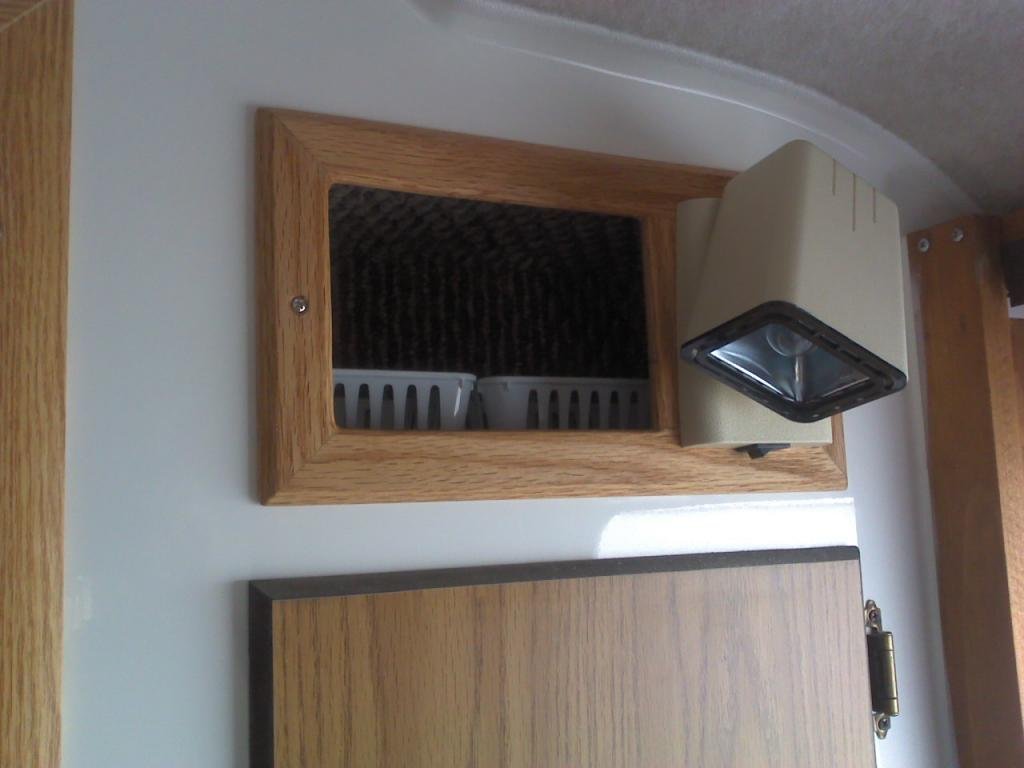
A cubby box and entry light

Simple cutting board from the store with plastic feet for over the burners
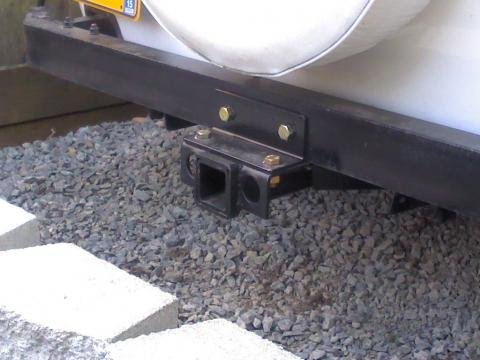
A reciever for our bike rack.

Outside shower.
We also added a 12V and 110V plug under the table as well as a book rack. Future projects will be a 12V light for over the stove and sink as well as a winter cover.
Happy trails from the crew of R Tardis
tried one on my scamp and I could bend the bumper with two fingers. is yours that way or did you do it a different way than I did. do you have better pics of how yours is mounted thanks
I bought my receiver from Harbor Freight. It is a truck bumper type. I then used (2) 3" x 3" x 1/8" angles and sandwiched the bumper between the two and bolted it all together. I made the the front angle about 3" longer than the back angle which I made just slightyl wider than the hitch. This is for attachment of stiffening angles back to the frame. I then bolted the reciever to the bottom of the (2) 3" x 3" angles. Next I bolted (2) 1-1/2" x 1-1/2" x 1/8" angels about three feet long to each side of the wider 3" x 3" front angle on the bumper and ran them on an angle back to the Scamp frame. I tapped the frame and bolted the angles to the frame. This will stiffen the whole assembly up. Attaching to the bumper only will definitely not be stiff enough because the vertical leg of the bumper will allow twist. If Scamp used tubing for the bumper instead of an angle it would be a snap to add a reciver but the angle they use makes it a challenge. It is a lot easier though than an Airstream bumper.
I hope this helps.
Happy Trails form the crew of R Tardis
Jeanine Jaeckel
Those are pretty elegant storage areas under the sink in your bath. Looks like white plexiglass+wood. Any construction details to share?
I made the cabinet out of 1/2" HDPE. I planned to use 1/4" but it does not have the textured face I wanted which is only availble in 1/2" and thicker. I used the plastic because I thought it would be fairly easy to work with and would hold up well in the shower. One of the draw backs is that you cannot glue this material so I had to screw the side panels to cleats on the top and bottom pieces. After building this one I would be more clever about how to screw it all togther. The corners are iron on wood edges that I stained with linseed oil. If I had to do it again I would jprobably use 1/4" plywood faced with laminate instead of the HDPE. I think it would be easier to work wtih, less expensive and would be fine for the shower. Because of all of the curves and odd shapes it is important to make a cardboard mock up first to make sure it all fits and still gives you enough room in the bathroom. It was a bit of a challenge to make it come out nice but as my wife says we have a real bathroom now instead of an outhouse so it was worth the effort.
Happy trails from the crew of R Tardis
Jeanine Jaeckel
Did you already have the sink at first?
<p>Doug Allen 2016 Ford F-150 2018 Lance 1575</p>
Wow! Really nice work! Very nice!
<p>Doug Allen 2016 Ford F-150 2018 Lance 1575</p>
I really liked your stove cover...
I like your outdoor shower/sprayer. Thanks for post the pix. Lots of great ideas. Well done!
Kate in Colorado
Newby
Everything you have done to the 13 looks terrific,you did a really good job of having things blend right in like they've always been there
Launey and Earlene
Thanks for all the nice comments. Sorry not to get back about the sink question. No our scamp did not have a sink. My husband found a small sink which made it possible for him to build the cabinet and still be "roomy" in the bathroom. Gary did all the work himself and I tell him how awesome it looks everytime I go out to R Tardis. If you would like to know where he purchased the sink I am sure he could share info. I know he did some research to find a very small one.
Jeanine Jaeckel
Pages