Hello Everyone,
It has been some time since my very last post on SOI since we arrived back home (So Glad to Be Here Too) from our /my bucket list 72 day trip across US, Canada and into Alaska and back home. I will not go over what happened on this post as I already gave you my (personal insight, recommendations for that trip if you plan one) in the SOI Forum "Travel Corner" post.
This update is for a couple of modifications I made on our 13' Scamp that I realized needed to be done before our 72 day trip but it was the first thing I started to accomplish the day after we arrived home from our trip.
As you already know there is not a lot of storage room in the Scamps especially after a trip like we made that we brought things that you would need for that extended vacation time we took. We survived without the modifications I made and I am posting but it would have been so much more enjoyable to have the extra storage I have made for our personal camper and I wanted to have completed before our next big camping week planned for Christmas week at Arcadia, Fl. This is a (Busnut Rally) I would sure like to extend the invitation for anyone with a Scamp in or near the Arcadia, FL area to consider attending. Here is the website for information to consider attending and I am sure our little scamps will be the hit at the Bus Rally where there is expected to be 80-100 all differently converted buses I am sure you would enjoy seeing as well. Website: http://www.arcadiarally.com/
Now for the modifications I have been talking about. Before I did these modifications I did not know that Scamp made extra back wall overhead cabinets over the dinning table so I made my own and also I added two smaller ones that will containg our medications and personal items there is no room to have. I asked the management at the Scamp Mfg. plant about this and I was not told of any cabinets available like I made to make room for the extra stroage room needed. I saw on our SOI forums that I believe Greg posted about having a back cabinet on the back wall like I made "After" I designed and installed my own on.
Anyhow it was fun to design and make (3) new stoage cabinets, install a 19" HD TV and a extension shelf for my wife to have a little more food preparation work area, and I also plans ahead for installing a 700 watt Microwave which we all agree I believe is needed for cooking ease. What would we do without our Microwaves or as I remember them being called (Radar Range) many, many years ago when first introduced to us. Now for the modifications:
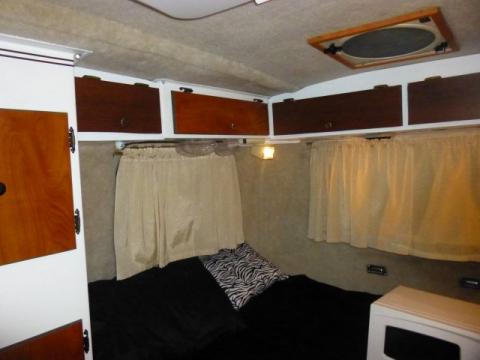
This is the inside of our stock standard 13' Scamp which has a shower and toilet, Yessss!! Not much overhead storage area, the same size cabinet is on the left hand side of Scamp.

These photos are of the modifications I made for the extra overhead storage on the left hand side of cabin we all need. Again, I was not aware that the back overhead cabinet that goes across the back of the camper over the table is available for purchase so I made my own although not professionally built, (I am not a cabinet maker by any means) but my wife is so happy to have this extra storage.
NOTE #1: my cabinet has two entrance doors in place of only one on the Scamp Mfg. design posted by Greg. Having two doors allows you to see exactly what you have inside your wide overhead cabinet without having to unload it to find articles stuffed way in the back of the cabinet and we all do that.
NOTE #2: These our Scamp cabinet doors will all be changed in the future, ($$$$) after the Alaska Trip is much less now to work with for now. I will change all the doors in the Scamp to match but I put (contact paper) wood design on the new wooden doors for now to use and it will suffice until I can reinstall all new doors and hardware.
Note #3: Notice that a smaller cabinet also has been installed on the left of the photo, (Between upright stoage cabinet near entrance door and actual left hand side overhead cabinet over left window. This small cabinet is great for my shaving gear, medicines and small things like (empty wallet) etc.
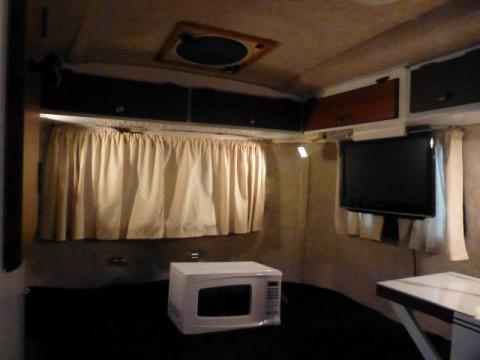
This is a shot of the complete back overhead cabinet over the dinning table that adds a lot of extra storage very much needed by the lady of the house for all those needed kitchen things. We always leave the bed in the bed conversion for instant use when needed by us or our 2 Chihuahua's or 2 Guinea pigs, (all part of our family we always travel with.) On the bed is the small 17" wide 700 Watt microwave I will install next to the 19" HD TV I also installed.
The 19" HD TV with DVD player is mounted to metal plate strategically placed to use the framing of the right hand window, which we don't use anyhow. Behind the TV is a specail window mounted HD TV antenna stuck to the window, it is tight in there but I did it. Now I have to move it over 4 inches more to the left to allow the installation of our new Microvave that you see pictured on the bed. I have not done this as yet but will before our Arcadia Bus Rally trip at Christmas Week in Florida. With this TV antenna we have to program it where ever we move to for vacations, two weeks ago at Palmetto Cove, Cleveland, SC we picked up 7 stations which is great. But we will always bring some movies with us incase the reception is not good for TV on rainy days. NIce days we enjoy sitting with friends, chatting lying, kicking tires, more lying and enjoying life of the Scamp Campers we also want to be as well as Bus Nut owners.
Notice the extra smaller cabinet on the right of the photo also which is my wife's storage area for her personal items which now we do not have to hide under the table area and dig for it every time it is needed. I am so pleased to have utilized each area for storage that I could. I will post the updates of the installation of the microwave when I have taken the time to do that.
This is a photo of the actual work area our mates has to prepare meals etc. and a little shelf can go a long ways for assistance needed to place things. I will install our Microwave above the new shelf I made next to the TV. It will be alittle tight but will make life easier forus all to have many of the comforts a larger camper has over us all.
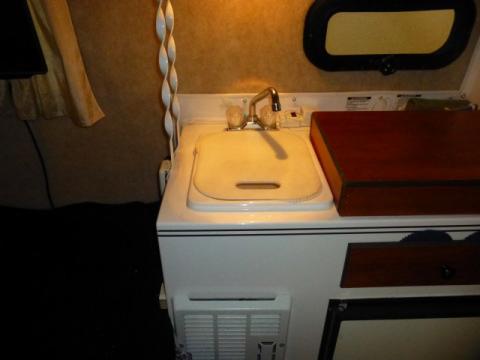
Here is the additional shelf area I have installed for my wife's work area, it has a cut out on the top section near the wall in case we do assemble the dinning area and it allows the installation of the upright couch cusion when assembled. This shelf is completely removable when not needed which only takes a couple of seconds to unbolt from the top.

After I completed the upgrades to our Scamp cabin I got back to work on my other love I have been working on for 13 years now, this is the engine for my 1973 Eagle (Trailways Bus Company) bus. This engine was purchased from a busnut friend but needed work to be brought up to standards for use on the road. I made a custom engine cradle and radiator cradle for testing the engine outside of the bus as it is really cramped when installed in the bus. All this takes time but I enjoy doing this stuff and reworking all parts needed on the bus engine and painting it is worth it as it really looks good now. I will post a photo of it before anything was done by me. I hope to give this engine the first test run in a couple of weeks. it takes 15 gallons of special coolant and 7 gallons of special oil to fill this baby up for running, so guess the cost of that SPECIAL lubricants is?? After 13 years I am in no hurry anyhow, when I get overwhelmed I just hook up the Scamp and take off for a weekend!!!

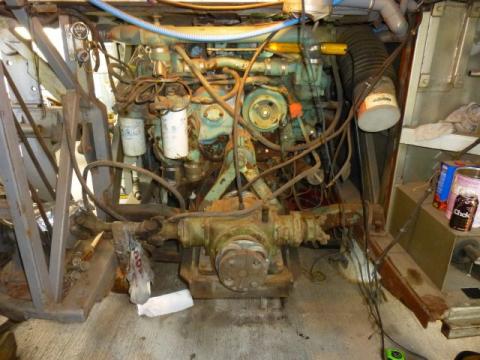
This is photo of my NEW engine purchased from a friend in Myrtle Beach as the day I picked it up. It took a lot of time and $$ to clean and upgrade the engine with new parts but this is only fun to someone who has a lot of time on their hands and enjoys making a (silk purse out of a sows ear) as the saying goes.

Here is another view of the new engine I purchased from a busnut for my bus as my old engine had broken parts inside of it.
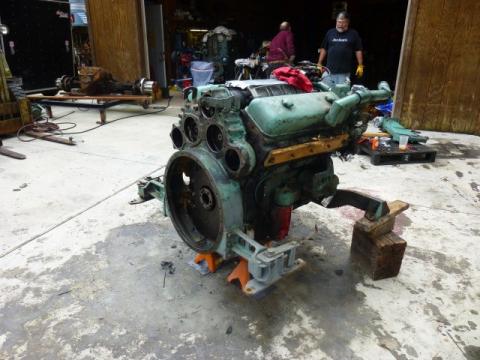
Here is photo to show you the size of this engine, 2300 lbs. without transmission attached, as I got ready to pull my original engine out of my bus.
Hope I did not put you guys to sleep with my post, and also hope it make make you consider upgrading your cabin also to have more room for storage.
Garylee
Garylee,
A suggestion for addtional kitchen work space. If you have a silverware drawer buy a small cutting board to fit on the drawer when open. I put a couple of small screws underneath the cutting board which keep the board from sliding side to side.
Joy A. & Olive
2001 13 Scamp "Puff"
Full-timer
2019 1500 Ram Longhorn
SOI #168