Hey guys! Figured I'd post some pictures of the work on the Scamp, a few people were asking about materials used so I'll throw links and all that in there too :)
This is it's original condition. It was pretty rough but usable, decided to tear it apart :)
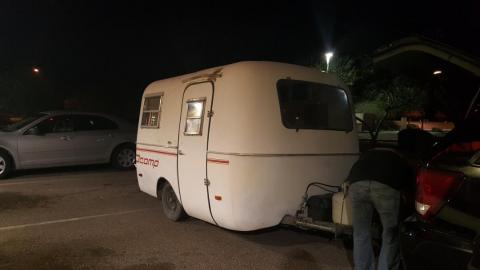
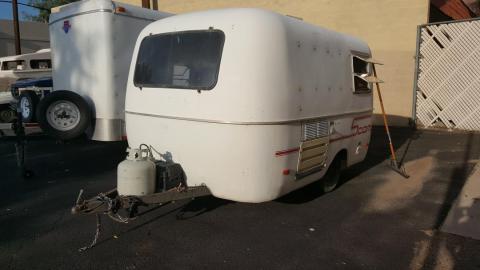
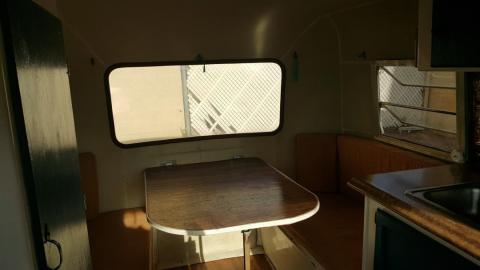
Took out the kitchen, overhead storage, bench seat/bed and closet to see how solid the floor, frame and body were and give a blank slate for new floor plan and a thorough cleaning

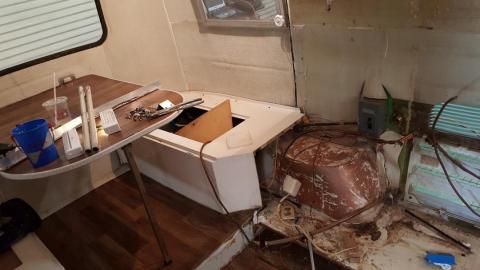

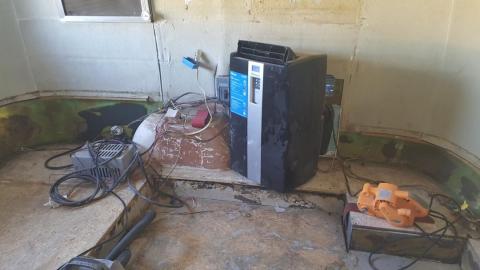
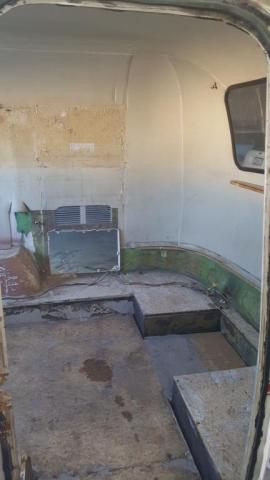
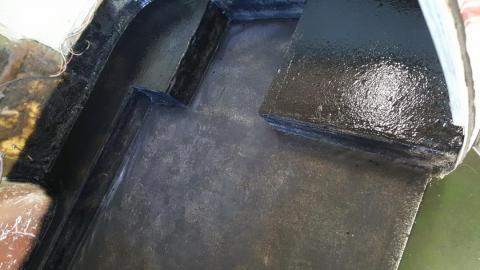
Ripped out 3 layers of stick-on floor, sanded the plywood, pulled the body back in to fit properly on the frame.
Then fiberglassed wall to floor to wall so everything stays in place and no chance at water rotting the wood from the inside at least, patched in some spots that had damage and then used bed liner on the floor - looks nice and more waterproofing...
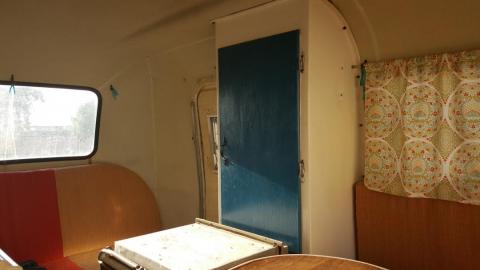
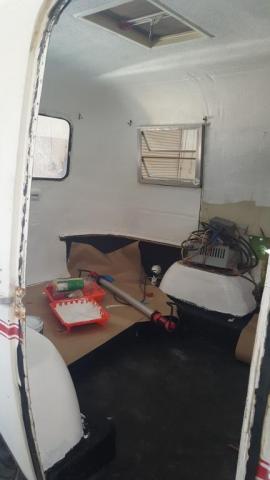
Started painting the walls inside

Installed vinyl plank flooring from Home Depot :)
Started welding up the frame for the new countertop/kitchen and the closet/pantry storage
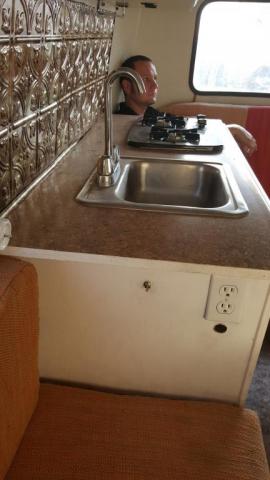
Tested the height/depth of new sink/faucet. The sink is just a bowl from Target and the faucet is a collection of brass plumbing fittings from one of several hundred trips to Home Depot. Also fiberglassed the huge holes where the old fridge vents were as well as a billion little rivet holes, water inlet holes, etc.
Prepped for the new windows (Bought whatever would fit on Ebay). All the little patch spots are fiberglass in rivet holes etc.
Had to patch the corners a bit where the red tape is for the new window shape.
Wood boards are holding the window in tight while the urethane dries. Door is off to replace the bushings on the hinges and getting a new window
Started sanding and using white primer to cover nasty fiberglass patches, looking cleaner!
Jerry fabbed me up this little battery holder with place for fuse box and circuit breaker
as well as a little holder for the water tank with a place to mount the water pump and power shut-off for the water pump in case leaks - Which I learned this weekend is actually super helpful with the pressure-sensitive water pump in case tubes decide to fall off and spray water all over your nice new floor...
The table top is just some birch plywood cut to shape with brass angle from Industrial Metal Supply (an amazing place if you ever have any needs for metal).
I wanted something decorative but unique for me so I got my mom to bring home leaves from my Nanas yard in New York to lay into resin
Used Best Bartop Epoxy, it looks super complicated but isn't too bad. Had to do it in the house due to temperature requirements. They give you a tool kit but you'll also need a blow torch, tarps and a drill - the youtube videos are very helpful.
Started welding up shelf supports for the pantry/closet
And a tinkler!
Table installed with new hardware, side window installed, and the beginnings of a new side table for the dinette/bed
Started pouring the countertop, it's a piece of 1/16" acrylic, leaves glued down and more resin over the top. Note: The table took 2 gal total of resin and the countertop took the same, the countertop is thinner though and some leaf parts are still poking up and need to be sanded/buffed down.
Lots of grinding and the countertop fits! Some amber LEDs are installed under the countertop so it glows from underneath through the countertop.
Several small fires later and a drawer is installed :)
Some little string lights from Amazon that are dimmable give off quite enough light at night time. They are 12volt run from the top of the new closet and have a remote for easy adjustments
Some birch plywood doors added, routed the edges all the way around and stained (hate the stain, going to redo it shortly)
Last two pics taken at Scamp Camp in Sedona :)
Notes: All lighting is 12 volt connected to the battery - there are two standard RV interior style lights on each side of the new closet as well as the string lights over dinette and undercounter lighting. There are 120V outlets under the dinette bench, on the kitchen at counter level and under the kitchen where a fridge will go in the future.
New LED brake lights and side markers
 are from Amazon
Still a lot to finish but that's where I'm at so far :) Will post updates as they come but definitely taking my time with it from here on out!
Schyler, its looking good and coming together,your doing an amazing job
Launey and Earlene
Thanks, Schyler for a terrific write-up of your progress to date. As one of the Scamp Camp attendees that got to see this work in progress on the trailer tours, one word comes to mind. FUN! This is a unique restoration, that is going to be a head turner as it continues to be restored.
Can't wait to see what you complete next, and I hope you'll bring this one to Quartzsite, cause it will be a very popular trailer people will want to tour.
Great work, terrific write-up.
Our Trailers:
2015 19 Escape
Buying or Selling Molded FG Trailers:
Fiberglass-RV-4Sale
Wow: a lot work! And "unique" for sure! Thanks for all the photos (a picture is worth a thousand words).
Why did you use metal to frame the cabinets?
Thanks so much! We actually put a lot of thought into the materials - we'll see if it pans out in the long runs BUT I used 1/2" steel tube for all the frames for strength, weight, cost and durability. I'll be towing it with my Mini Cooper once it's up and running so weight was definitely a priority - and i'm poor/cheap so cost is also a big factor :) My thoughts, which may be completely wrong:
Aluminum: Costs more, comes in a larger width so the weight savings would be minimal at best, harder to weld
Fiberglass: Costs more, more tricky to make it look straight and finished but definitely lighter
Wood: Cheaper but more weight, not as strong and possibility of rot.
Steel: Cheaper, easy to weld, not too heavy in this width, possibility of rust but with proper paint it should be good *Winner!*
I think the whole frame for the closet is about 40lbs and the kitchen frame is maybe 20lbs. This is all a learning experience for sure so I'll post up all the failures and successes as they come :) It was definitely great seeing all the various modifications and additions to the Scamps and SOBs at Scamp Camp! Lots of inspiration!
Looks great! You can tow it with a mini Cooper?
By the way - if anyone has a desire to do something with the resin link above or anything like it I definitely have some tips and things to avoid so you don't waste much time and money. There were a few issues with mine and I'll probably end up redoing it eventually but I learned a lot.
Clearly, you are better at welding than I! (I know how work with wood, but not metal--except where necessary!)
Looking great! You really have talent to accomplish such work. Keep it going. Exterior paint coming soon? Inside it shall be so unique and as Greg said, a real head turner! Keep those pics coming.
<p>Doug Allen 2016 Ford F-150 2018 Lance 1575</p>
Pages