This is a post i did about a year back on another forum and thought it might help here
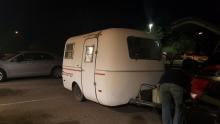
Outside Shower Installed in a 1994 Casita Spirit Deluxe 16’
I needed to have an outside shower with Hot and Cold Water for times when I just wanted to rinse off, clean up things, wash dishes, not fill up the gray tank or just to keep the humidity out of the trailer as I still had a full inside shower and toilet. The project was actually easier than I anticipated and would not hesitate to do it again on another trailer. You do not need to be a top notch handyman just basic skills in measuring, jig saw operation, pex plumbing and a little common sense.
While there are many ways to do things and no one way is any better than some others this is how I did mine.
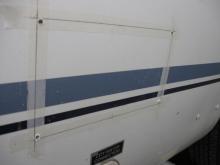
I looked inside my front bench seat to get an approximate look at where I wanted to cut the 6”x11” hole that was needed (the finished product is about 8.5”x13.5” Do not cut the hole this large) My 6”x11” hole cutout is about 4.5” up from the brass connection for the outside water connection. (measure yours up from the inside to be sure it will work for you if you have a different size trailer)
I marked out my cutout area then put masking tape over the hole to protect the fiberglass from the jig saw blade and re-drew the line on top of the tape and then drilled out the four corner holes large enough to get a jig saw blade in there and then proceeded to carefully cut out the 6”x11” Section (check your directions as you may require a different size.

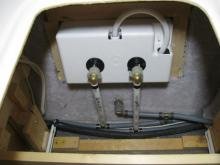
Inside View board on rear is for an upper shelf inside that I re-configured later on


Next I removed the rug 2” around the inside perimeter of the hole then glued and clamped 1”x2” pine with caulk adhesive and let it set overnight.

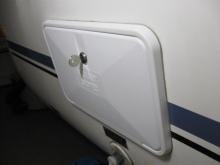
The next morning I removed the clamps and laid out butyl tape on the outside a little larger than the diameter of the shower assembly and installed the assembly and inserted 10 stainless steel wood type screws to which I slowly tightened in random patterns until I felt the butyl tape was squeezed out successfully but not so much as to strip the screws going into the wood re-enforcement. When that was done I simply took a plastic scraper on edge and trimmed the excess around the perimeter and cleaned it up real good.


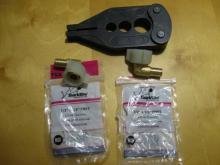
Now we go to the inside to finish things up…… well I had a small portable pex tool to put the copper rings on the ½” pex but let me tell you that trying to get that tool around the pex tubing and away from the wall was nearly impossible to get in there to work and if I had to do it again I would have gotten the slide on “Shark Bite” Fittings instead….. Lesson learned for me and I will keep a few shark bite fitting handy in case repairs are needed in another tight spot like that. I finished up the plumbing and re-installed the lower drawer and made a shorter top shelf and am really happy with the job that I been meaning to do for a long time.
Thanks for reading my install procedure and see the final pictures below.
Joe Z


New Comments