Hello Everyone,
Today I did another project I wish to share with you all that may be interested to do or consider doing. I will include photos of my project, where I got my parts I used and the price of them as well.
The (shorepower mouse hole) is a potential menace I believe the Scamp MFG. should of considerred a design change on for a better selling feature for a brand new camper, which ours is, it is a 13' Scamp. We love it but it needs a few changes to please me for the price charged.
Rather than bore you with lots of reasons to protect you and your camper from intruders, snakes, mice, ants, actually anything that flies, or crawls will find this MOUSE HOLE and be there for you to find either with you are sleeping in your bed or when ever you go into this stoage area for the shore power cable storage area.
Photos and some explanations:
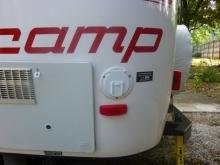
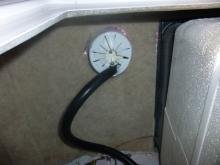
MOUSE HOLE OPENING as received with our new 13' Scamp trailer.


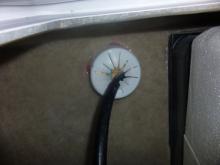
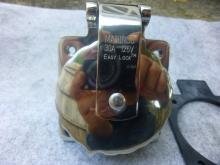
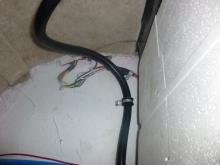
Inside shore power compt. Notice size of center opening, Snakes, mice and ants are welcome here. The photo on the bottom of these 3 photos is the new shore power connector I purchased off (Amazon.com).


(1) Leave original outside Mouse Hole Opening flange for reinforcement of camper as you install new shore power connector. This leaves a nice flat or near flat surface to mount the new shore power spacer and then shore power connector. (2) I used a MINI grinder to remove the mousehole door hinge pointed out in photo below, (left). Also take your grinder and grind off the crown of the rivets but do not remove the entire rivet, this will continue to hold on the original mousehole mounting bracket. (3) photo on the right, is the new shore power mounting plate I cut out of aluminum 1/8" diamond plate I had left over as scrap from my bus project. (4) I also cut out a 1/32" rubber gasket to put under this aluminum mounting bracket I cut the same size as the original mousehole bracket. (5) NOTE: you will have to grind off some of the diamond plate features on the mounting plate to have the new shore power bracket fit flat on a rubber gasket and then mounted to this mounting diamond plate.


(1) Left photo is of Shore Power mounting bracket for reinforcement against the Scamp Fiberglass wall. I used (6) 6-32 stainless bolts to mount this bracket, taped into the original housing of mousehole. (2) cut your wire outside your camper about 6-8" from original shore power cable. (3) Be sure you left a little slack inside the shore power storage area, mount the cable securely to the floor so it will not be floating all over the lot. It looks better too securely mounted with a little slack on cable before exiting to outside of tailer. (4) Put bead of Silicon Calk around the outside edge of new spacer mounting bracket to assure no water can seep through the gasket also used. This is just a precautionary measure on my part, but it looks professional as well when it looks good. mfg should of made this a good selling feature to new customers. Oh well!!! Even the car industry has changed their quality methods now in competition with Kia etc. I know what I would do if I was on the design board of these campers, I would take many of your suggestins and incorporate them to make their product of the hightest quality on the market.


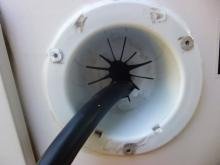
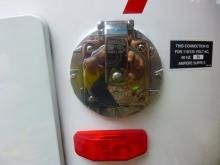
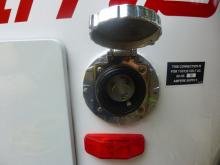
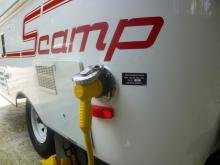
(1) Left photo is inside shore power storage area. You can choose to cut off these worthless fingers of the original shore power MOUSE HOLE. I wish I had now just for cosmetic reasons, this opening is disgusting so I would recommend cutting it off with a mini grinder before assembling new cable and anything. (2) right photo is of the new shore power connector fully assembled, and closed not letting in (moisture, bugs dust when traveling down the road or anything. Everything is sealed, and looks great and ready for hooking up day or night, in any weather. (3) Photo on bottom is of new shore power connector with the screw on type of cap lifted so you can see how it looks inside when all connected up properly, all weather proof, bug proof, snake proof and what ever.
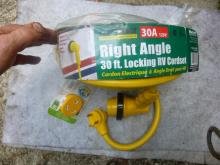
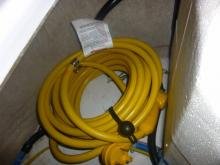
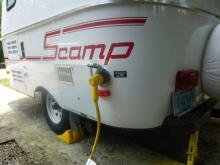
(1) Left photo I also ordered this right angle, 30', safety color yellow 30amp connection cord that is detachable for storage when not in use. I got this as part of the entire package from Amazon.com, Marinco (30RPCRV) 30 Amp Right Hand Angle Locking Cord . This cable is heavy duty, #8 wire and very safe and weather proof when connected up at both ends. (3) Right photo is of new right angle connection cable stored in original stoage area under dinning seating area, temporarly as I have a plan for storing this stuff as well and will post new plan when completed and mounted. (4) bottom photo if long distance shot of new 30 amp shore power connected up which looks great to me.
Well this post is complete, I hope I have make it simple looking for you to consider to do. It is well worth not having to wonder what is inside the storage compartment after storing or camping in a sandy, woodsy, or any area.
Thanks for viewing,
Garylee
New Comments